Shocking! How A Leaky Shower Head Almost Ruined My Life (And How To Fix It)
Have you ever been kept awake at night by that incessant drip, drip, drip of a leaking shower head? I certainly have, and I can tell you firsthand that what seems like a minor annoyance can quickly escalate into a major headache. A leaky shower head not only disrupts your peace but can also lead to skyrocketing water bills and potential water damage. In this comprehensive guide, I'll share my personal experience and walk you through the steps to fix that pesky leak once and for all.
Understanding the Problem: Why Shower Heads Leak
Shower heads are subject to several problems when it comes to leaks, and understanding these issues is the first step in solving them. The most common culprit is mineral buildup from hard water, which can clog the tiny holes in your shower head and cause water to leak from unexpected places. Other causes include worn-out washers, damaged O-rings, or simply loose connections between the shower head and the pipe.
A showerhead leak can be annoying and a major waste of water. Did you know that a shower head leaking at 10 drips per minute wastes more than 500 gallons per year? That's equivalent to running your dishwasher 60 times! This startling statistic highlights why addressing a leaky shower head isn't just about comfort – it's about conservation and cost savings too.
Tools and Materials: Preparing for the Fix
Before you begin, gathering the right tools and materials will make the job much smoother. Here's what you'll need:
- Adjustable wrench or pliers
- Screwdriver (flathead and Phillips)
- Replacement washers or O-rings
- Teflon tape (also known as plumber's tape)
- White vinegar
- Old toothbrush or small brush
- Clean cloths or rags
- Bucket
Having these items on hand will ensure you're prepared for any issues you might encounter during the repair process.
Step-by-Step Guide to Fixing a Leaky Shower Head
Shutting Off the Water Supply
To fix a leaking shower head caused by clogging, start by turning off the water supply to your shower head. This crucial first step prevents water from spraying everywhere when you remove the shower head. In most homes, you can shut off the water supply to the entire bathroom, but if you're lucky enough to have individual shut-off valves for your shower, use those instead.
- You Wont Believe This Nude Leak From The Academys Genius Swordmaster Wiki
- Jessica Lee Davis Husband The Untold Story Behind The Glamorous Life
Removing the Shower Head
Next, remove the shower head faceplate or the entire shower head from the rest of the shower fixture. Use your adjustable wrench or pliers to carefully unscrew the shower head. Be gentle to avoid damaging the fixture – wrapping the wrench in a cloth can help prevent scratches. If the shower head is stubborn, try applying some penetrating oil and letting it sit for a few minutes before attempting to remove it again.
Inspecting and Cleaning
Once you've removed the shower head, it's time for a thorough inspection. Look for signs of mineral buildup, corrosion, or damaged parts. If you notice white, crusty deposits, you're dealing with hard water buildup. This is where your white vinegar comes into play. Soak the shower head in a bowl of vinegar for a few hours (or overnight for severe buildup). The acetic acid in the vinegar will help dissolve the mineral deposits.
After soaking, use an old toothbrush to scrub away any remaining buildup. Pay special attention to the small holes where water comes out – these are often the most clogged. Rinse the shower head thoroughly with clean water when you're done.
Replacing Washers and O-Rings
Many leaks occur due to worn-out washers or O-rings. These small rubber components can deteriorate over time, allowing water to seep through. If you notice any cracked, brittle, or misshapen washers or O-rings, replace them with new ones. These are inexpensive and readily available at most hardware stores.
Reassembling and Testing
Before reassembling, wrap the threads of the shower arm (the pipe coming out of the wall) with Teflon tape. This creates a watertight seal when you screw the shower head back on. Wrap the tape clockwise around the threads 2-3 times, then carefully screw the shower head back into place. Use your wrench to tighten it, but be careful not to over-tighten as this can damage the threads.
Turn the water supply back on and test your handiwork. Check for any leaks around the connection point. If you notice any drips, you may need to tighten the connection slightly or reapply the Teflon tape.
Advanced Fixes for Stubborn Leaks
If you've tried the basic steps and your shower head is still leaking, don't despair. There are a few more advanced techniques you can try:
Replace the entire shower head: If your shower head is old or severely damaged, sometimes the best solution is to replace it entirely. Modern shower heads often come with improved water-saving features and can give your bathroom a quick facelift.
Check the diverter valve: In showers with a tub spout, the diverter valve controls whether water flows to the shower head or the tub spout. If this valve is worn or damaged, it can cause leaks. Replacing a diverter valve is a bit more complex and might require professional help if you're not comfortable with plumbing tasks.
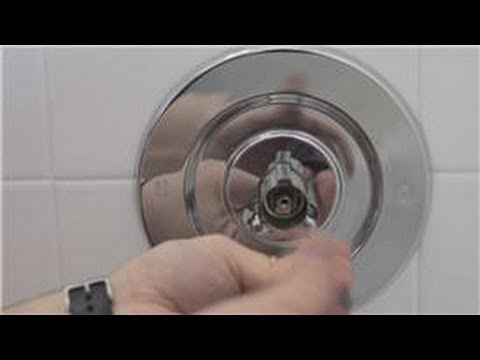
Inspect the cartridge: For showers with a single-handle control, the cartridge inside the valve can wear out over time. This can cause leaks even if the shower head itself is in good condition. Replacing a cartridge involves removing the shower handle and can be tricky, so consider calling a plumber if you suspect this is the issue.
Preventing Future Leaks
Now that you've fixed your leaky shower head, let's talk about prevention. Regular maintenance can extend the life of your shower head and prevent future leaks:
- Clean your shower head regularly: Every few months, remove your shower head and soak it in vinegar to prevent mineral buildup.
- Check for leaks periodically: Make it a habit to inspect your shower head for any signs of leaks or damage.
- Install a water softener: If you live in an area with hard water, a water softener can reduce mineral buildup not just in your shower head, but throughout your plumbing system.
- Be gentle: Avoid using excessive force when adjusting your shower head or its settings. This can damage the internal components over time.
When to Call a Professional
While fixing a leaky shower head is often a simple DIY task, there are situations where it's best to call in a professional plumber:
- If you've tried multiple fixes and the leak persists
- If you're uncomfortable working with plumbing
- If the leak is coming from inside the wall rather than the shower head itself
- If you need to replace major components like the shower valve or cartridge
Remember, attempting complex plumbing repairs without the proper knowledge can lead to more extensive (and expensive) damage.
Conclusion
Fixing a leaky shower head is a doable task for all homeowners, and it's one that can save you money, conserve water, and restore peace to your bathroom. By following the steps outlined in this guide, you can tackle this common household problem with confidence. Remember, that annoying drip, drip, drip doesn't have to be the soundtrack to your life. With a little effort and some basic tools, you can silence that leak for good.
So, the next time you find yourself lying awake, staring at the ceiling while your shower head keeps time with its incessant dripping, don't despair. Armed with the knowledge from this guide, you're now equipped to take action. Fix your dripping shower head fast with our simple DIY guide, save water, cut bills, and stop that annoying leak today. Your peaceful nights and lower water bills await!

How to Fix a Leaky Shower Head: A Step-by-Step Guide - 1 Tom Plumber
How To Fix A Leaky Shower Head - Individualfunny

How to Fix a Leaky Hand Held Shower Head: 3 Simple Solutions

